I pulled a "Ferris Bueller" today - ate lunch at a nice Cajun restaurant (I did NOT eat pancreas!... movie joke), looked at some beautiful works of art, and then had some fun with my NXT.
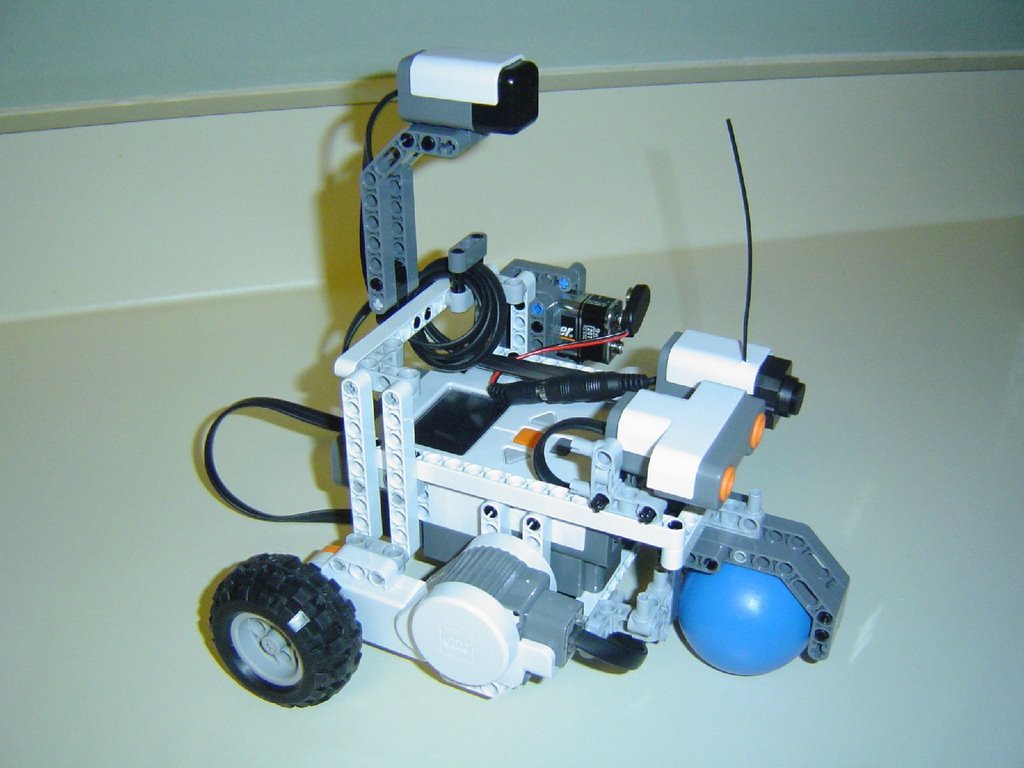
Okay, so my goal was to experiment a little more with the Compass Sensor (CS) block that HiTechnic just released. So, I modified Sneeker by adding the CS on the rear and up above the robot as shown here.
 Now, I needed a job for this little bot to do. Typically I try to have a game plan before I start programming, so take a look at this figure to get a look inside how my mind works. I first write down a list of the steps I want the bot to perform... and then I try to draw a sketch (if it helps, and it did here) of the scenario. Notice the numbers on the drawing correspond to the numbers in the task list.
I want the bot to perform a grid search (of sorts). The solid line is the path it will follow and you'll notice that it repeats itself, but in smaller size. When it reaches point 9 on the drawing, it'll simply start over by turning North and beginning a smaller version of the larger path... I hope this is making sense.
You might also notice that steps 1 and 2 talk about calibrating the sensor and beeping when it's done... because of the sheer number of tests I was running, I got tired of it doing this portion of the program so I deleted it out... but I were really wanting to do this correctly, I'd put back in the calibration option. But not today...
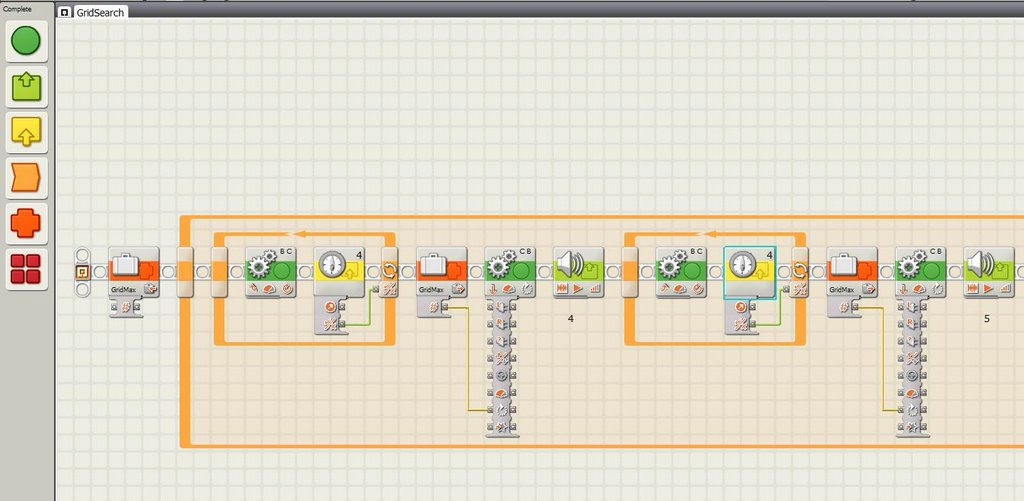 Here's a screenshot of part of the program. One thing I always do is "over program" - this means that I tend to put too much code in initially and later I'll start to see ways to reduce the size of the program and make it run more efficiently. Not with this program... it's big and ugly and it's only job is to get through the search.
 I use the Compass Sensor block to try and hit an "Absolute Reading" - here I've set it to send a "True" logic result to a LOOP block that will break when the Sensor reads a value between 0 and 5 (for North). For East, I checked between 85 and 90, for West between 265 and 270 and South with 175 and 180. If the sensor didn't read between a range I configured, it would spin the bot in small .05 rotations using a MOVE block. (You'll see this if you watch the video).
This writeup doesn't give you the entire picture of the project - there were plenty of problems I encountered. Here are some summaries:
1. I had to change the small movements from .1 rotation to .05 rotation because there were instances where the the robot might rotate just 1 or 2 degrees too far and miss its mark. (You'll see this in the video where it has to make a 2nd pass around to detect East - I've added narration to the video, so you won't miss it.)
2. I learned something new today about the VARIABLE block. I forgot that to set an initial value, you have to leave the block set to WRITE. I had been setting the value (to 1080 degrees or 3 rotations) and then clicking on the READ option which greyed out my set value... I won't make that mistake again.
3. Although the video doesn't show it, I included SOUND blocks after each turn that would say "3" or "4" or other number that corresponded to my earlier task list and drawing. This made it easy to figure out where in the process my bot was... with all the turning, you can quickly forget where your bot is in the process... again, watch the video and you'll hear me try to figure out where exactly the bot will be going next.
4. Finally, in the video you'll also notice that sometimes the robot will be facing East or West and needs to turn South... well, I programmed incorrectly a few times and sometimes the bot will go the LONG WAY around... spinning away from South and going 270 degrees away to only return to South eventually... good programming would have given the bot the ability to find the shortest path (90 degree turn) instead of wasting time.
Lastly, here's the link for the video. It is 5MB in size, so consider yourself warned. My apologies for the Southern accent... part Texan - part Floridian. The sound volume is a bit loud, too, and I'm trying to figure out how to lower it...
 If you want to view the program, click here to download it.